Once your Airbnb account is successfully connected to Sympl via API, you may wish to create a new Airbnb listing based on a pre-existing Sympl property.
If you already have a Sympl rental created, uploaded images, created rates, and updated booking preferences, you may begin creating your Airbnb listing below. If not, you'll need to create a Sympl rental first.
Creating an Airbnb Listing from a Sympl Rental
Locate the "Channels" drop-down menu in the main menu bar at the top of your Sympl dashboard, then select "API Channels" from the list.

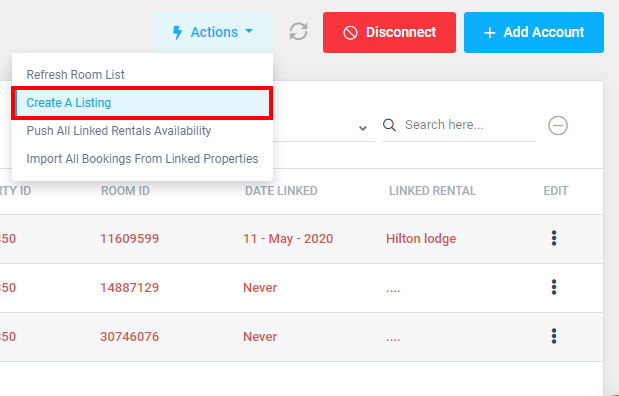
Once the API Channels page is open, locate your Airbnb channel connection in the list of existing connections on the left side of the screen. Click the "Channel Details" tab and locate the "Actions" button at the top-right side of the page.
Select "Create A Listing" from the dropdown.
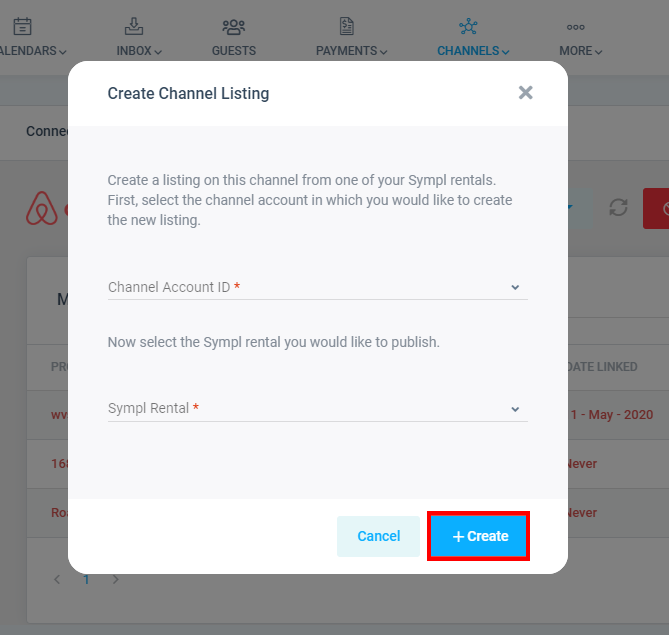
When the "Create Channel Listing" overlay window appears, select your Channel Account ID from the dropdown list, as well as the Sympl rental property that you'd like to create a new Airbnb listing for. Once selected, click "+ Create".
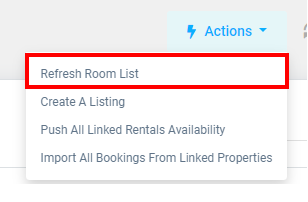
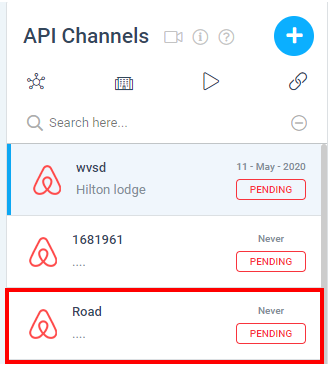
If done correctly, you will receive a success message to inform you of the listing's creation. You should also see your new listing appear in the Mapped Rentals list for your Airbnb channel connection. If you've received a success message but cannot see the listing there, click the "Actions" button again and select "Refresh Room List".
Your basic listing has now been created - the following steps will take you through the process of syncing the rest of your rental's data and settings to create a completed listing in Airbnb.
Completing Your New Airbnb Listing
Sync Booking Preferences: On the API Channels page (Channels > API Channels), select your Airbnb channel connection from the list on the left.
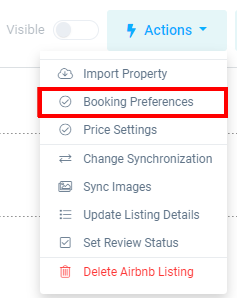
The channel page that opens will display the "Connection Details" tab by default. Click on the "Actions" button at the top right of the page.
Select "Booking Preferences" from the Actions drop-down menu that appears.
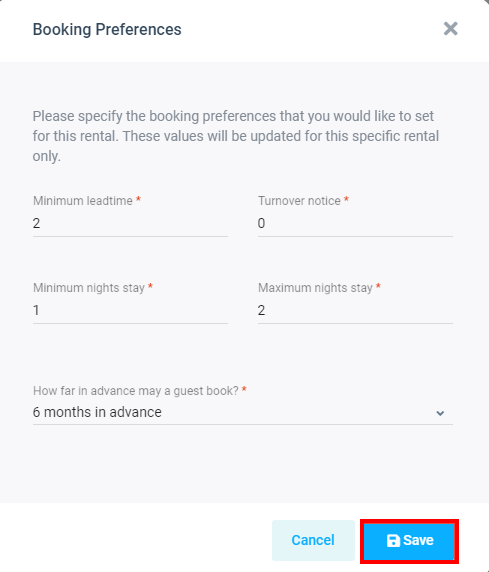
Enter your desired booking parameters for this rental that you'd like to be applied to your Airbnb listing.
Minimum Lead Time: Minimum time allowed prior to arrival.
Turnover Notice: Days allowed between bookings.Click Save button and Your booking preferences are now set.
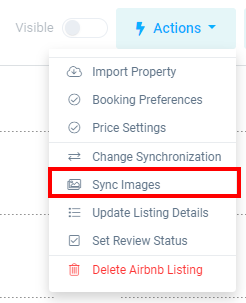
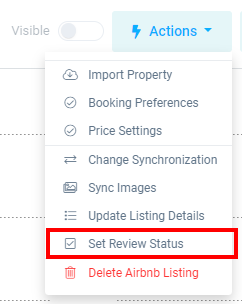
Sync Images: From the Connection Details tab (same as above), click the Actions button and select "Sync Images" from the dropdown menu.
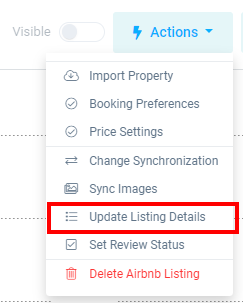
Update Listing Data: From the Connection Details tab, click the Actions button and select "Update Listing Details" from the dropdown menu.
Adjust Review Status: From the Connection Details tab, click the Actions button and select "Set Review Status" from the dropdown menu. In the window that appears, you may select "Ready for Review" from the dropdown and click "Save".
You have now created a fully-featured Airbnb listing from your Sympl dashboard.